


-
Naturally Dyed Easter Eggs!
Don’t you just LOVE Easter? It’s one of the very best weekends of the year. It’s all about rebirth and renewal, thankfulness for our beautiful word! In preparation for a great weekend packed with egg hunts, treats, Easter baskets and more, we made naturally dyed Easter eggs! The colors came out well, so lovely and pastel.
To make them yourselves add the following to 2 cups of water and 1 tsp of salt!
.
Blueberry: 2 cups boiled
Yellow onion: 2 cups boiled
Coffee: just black coffee
Beet juice: a cup of juice and 1 tbsp vinegar
Turmeric: 2 tablespoons ground
•The best thing about naturally dyed Easter eggs is that if you decide you’d like to eat them, then you have no worries about only good things being inside. Happy Easter You Guys!!
-
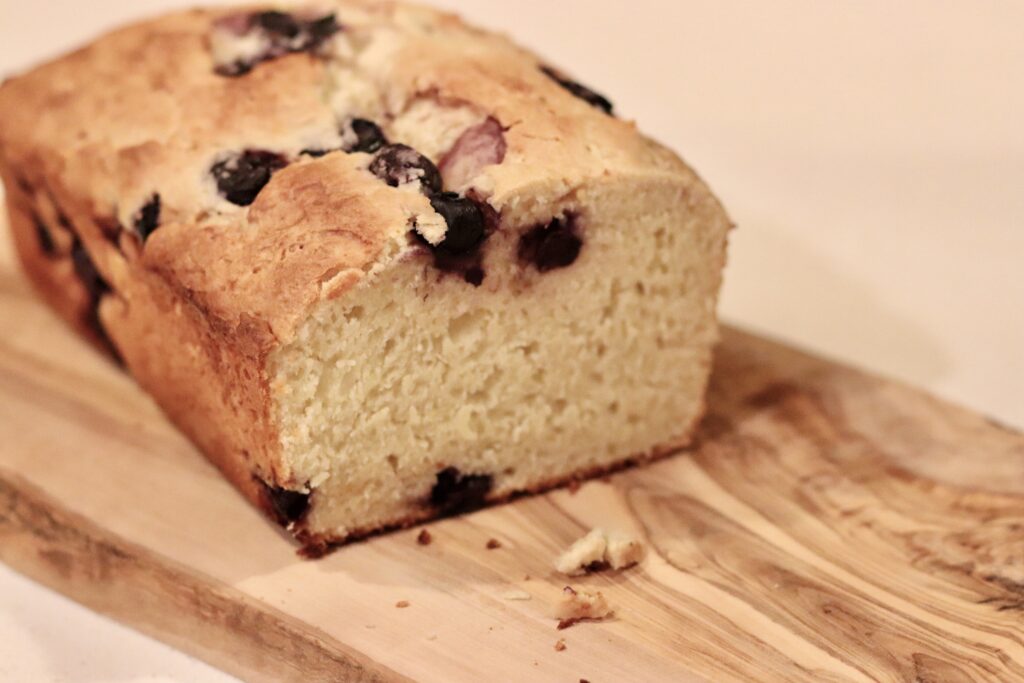
Blueberry Lemon Yogurt Loaf
This light loaf is the perfect addition to your Sunday morning coffee. It’s light, yet rich and lemony too! You could also add a blueberry compote with a scoop of ice cream and serve it for dessert. Yum, Yum!
Preheat oven to 350 Degrees
Ingredients for Blueberry Lemon Cake
- 2 cups flour
- 2 teaspoons baking powder
- pinch of salt
- 1/2 granulated sugar
- 2 eggs
- 1/4 cup olive oil
- 1/4 cup coconut oil
- zest of 1 large lemon (add more if you want a pucker!)
- 3/4 vanilla extract
- 1 1/4 cups greek yogurt
- 1 cup fresh blueberries (if using frozen, thaw before adding and drain out water)
Method
Grease a loaf pan and set aside.
In the bowl of a mixer, whisk sugar and eggs together until pale and smooth, add olive oil, coconut oil, lemon zest, and vanilla. Mix until combined. Stir in yogurt.
In a separate bowl, whisk together flour, baking powder,
and salt. Add to wet ingredients and stir until just combined.Fold in blueberries. Place the batter in the prepared baking dish, smooth the top and bake for 50-55 minutes or until a toothpick comes out cleanly.
Let cool for 15 minutes before serving. Enjoy!

-
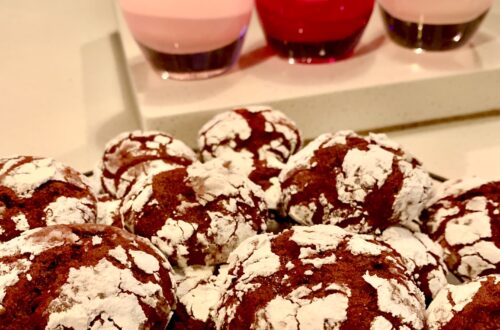
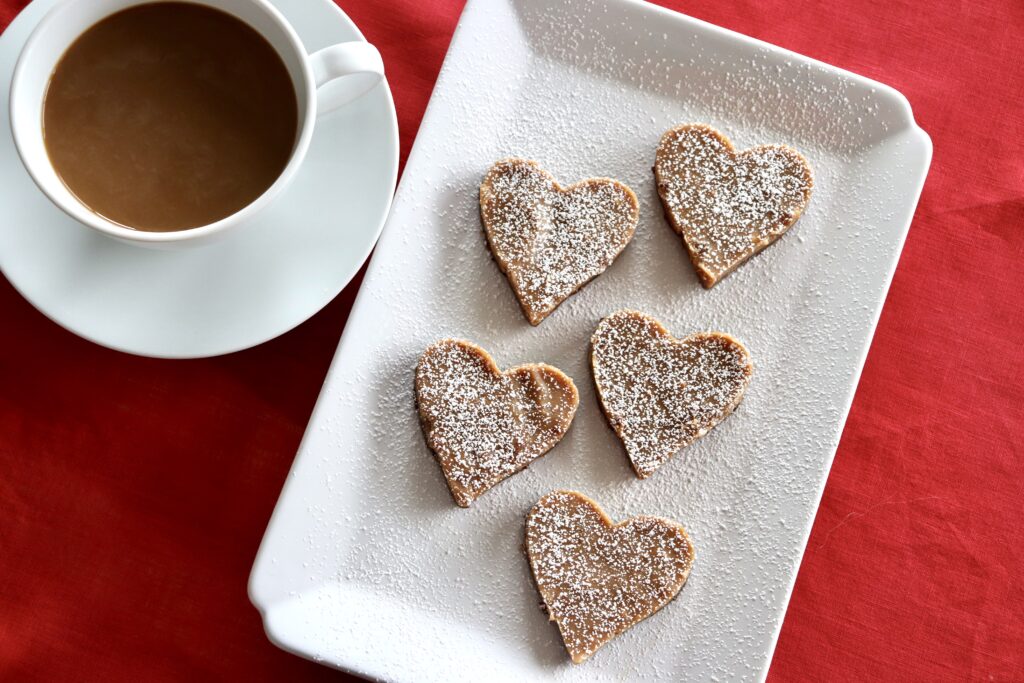
Red Velvet Crinkle Cookies
These cookies are perfect for Valentine’s, Galentine’s, or any “tines” day! Cake-like, full of flavor, and fun to make, bet you can’t just eat one!
Makes 20 cookies

Ingredients
- 1 1/3 cups flour
- 3 tbsp cocoa powder
- 1 tsp baking powder
- 1/4 tsp baking soda
- 1/4 tsp salt
- 1/3 cup brown Sugar
- 1/3 cup white sugar
- 1/4 cup butter (room temperature)
- 2 eggs
- 2 1/2 tsp vanilla
- 1 tsp red food coloring
- 1/4 cup powdered sugar
Method for Red Velvet Crinkle Cookies
In a bowl combine your dry ingredients; flour, cocoa powder, baking powder & salt. Give it a quick whisk and set aside.
In a large bowl cream butter and sugar together with an electric mixer until light and fluffy. Add in eggs and vanilla and mix together until combined. Slowly add in dry ingredients and mix together until thoroughly combined. Add in red food coloring a few drops at a time while mixing until a deep, bright red hue is achieved.
Cover the bowl with plastic wrap and chill in the refrigerator for at least 30 minutes or up to overnight.
Preheat the oven to 350 degrees and line a baking sheet with parchment paper or spray with nonstick cooking spray. Pour powdered sugar onto a plate or in a shallow bowl. Scoop chilled cookie dough into small balls and roll in powdered sugar. Once you’ve rolled all the cookie dough balls in powdered sugar repeat this step one more time, roll in the powdered sugar once more to get a good coating of powdered sugar on each cookie.
Bake in the oven for 10-12 minutes. Allow cookies to cool for 2 to 3 minutes before you transfer to a wire cooling rack to cool completely. Serve immediately or store in an airtight container for later.
-
Festive Chocolate Drizzled Pretzels!
These chocolate covered pretzels are so delicious, they add the perfect amount of savory and sweet, and are the perfect treat with a cup of coffee or tea!
The beauty of these, is that you can really make them for any holiday or season. Just change up the sprinkle colors for Halloween, Christmas, or even Easter with pastels and white chocolate!
Makes 16 Pretzels

Ingredients
- 1 cup semi sweet chocolate chips, melted
- 16 pretzel rods
- Valentines day sprinkles
Method
Place chocolate chips in a
microwave safe bowl. Microwave on high for 1minutes at 50% power, remove from microwave and stir. The chocolate chips won’t be fully melted so continue to microwave on high in 10-15 second intervals, stirring in between until all chips are melted! Set aside.Cover a cookie sheet with parchment paper or a Silpat, lay 16 pretzel rods on the cookie sheet and drizzle chocolate over them. Keep drizzling until you’ve reached your desired “chocolaty-ness”
While the chocolate is still wet, add your sprinkles and place
in the refrigerator for 20-30 minutes. The chocolate will be set and your chocolate Valentines day pretzels are ready to serve!Enjoy, Friends!
-
To Wine or Not to Wine? A Wine Tasting Party!
Need a fun weekend activity? How about throwing a wine tasting party? It’s so much fun and obviously the only approved kind of “Wine-ing!”
We began by inviting 8 people, and had each pair bring a bottle of wine wrapped inside a paper bag, Each bag was then given to 1 person (the sommelier) for the evening and the fun began!!
What you need…
- Friends…preferably friends who like wine, and talking about flavors would be a plus!
- 1 friend designated as the “sommelier” they won’t be as into the tasting as they’re somewhat “working” but they can still play along. Pick someone charismatic.
- Printable “tasting” notes cards…find one on the internet or make it up..!
- Snacks! cheese platter, grilled meat, and my all-time favorite, smashed potatoes
Viola, that’s it! I would say that’s an evening well done, don’t ya think?
Stay classy!
-
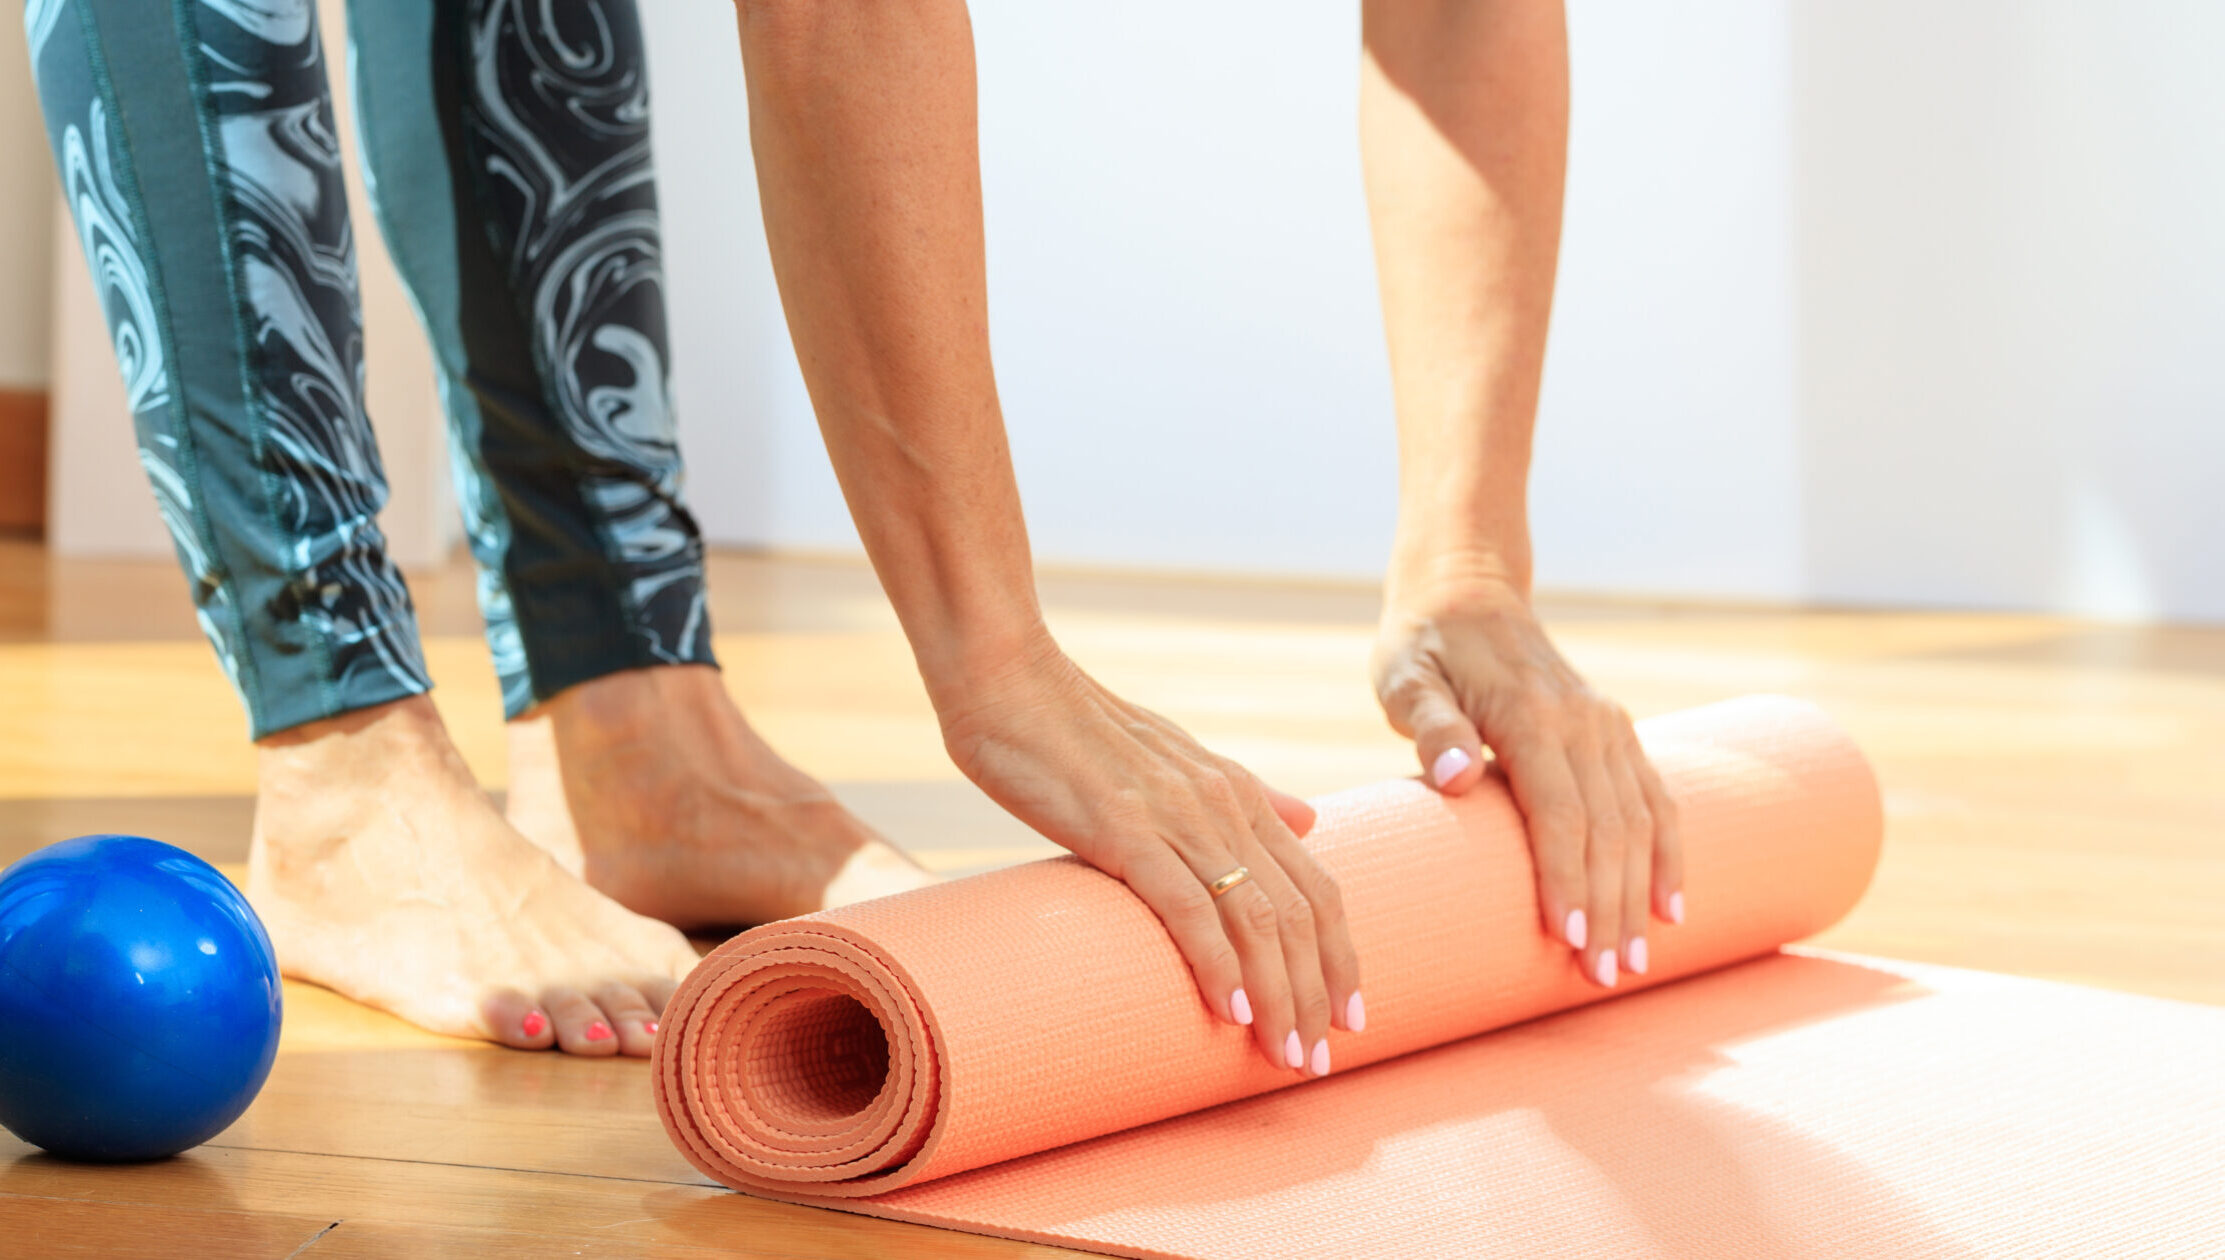
Is a quick Pilates workout worth it?
We know it sounds too good to be true, but we promise it’s true! With Fittbe Pilates, it has never been so easy or fun to get fit. Popular, amongst celebrities, dancers, and athletes, the effectiveness of Pilates just might blow your mind. The Best thing is that you will start to see the results fast. Founder, of the method, Joseph Pilates explained that in “In 10 sessions you’ll feel the difference, in 20 sessions you’ll see a difference, and in 30 sessions you’ll have a whole new body”!
Now, ready for a shocker? Pilates has a cumulative aspect. It’s not just that the more you do, the better you will get. It’s actually that you’ll get more out of each exercise! A perfect example of this comes from the woman who formally trained me to teach back when I was 17 years old (wow, a loooong time ago). Now, to get a mental picture… This woman was supermodel gorgeous. Not skinny, but strong with these long limbs – just, wow. She was in her mid 50’s. As she stood in front this group of eager, green, soon to be teachers, she described that she could get her own full Pilates mat session done in about 15 minutes.
I found myself wondering whether she was suggesting that a shorter workout was better than a long one! She then took to the mat to show us. She began with a classic warm up like imprinting and roll ups, then moved to leg circles, the clock, scissors, and beyond. To my surprise, she only did about 8 scissors. 8! The thing was, these 8 scissors, along with every other exercise she showed us, were absolutely perfect. The placement, the precision, and her mind-body connection. She worked up a sweat in 15 minutes worthy of a full hour because she deliberately put so much effort into each perfect movement.
What does this cumulative honing of your skills earn you? A method of exercise uniquely suited to give you major results. You will see and feel muscles that have been hiding, and awaken a feeling of balance and beauty! So, keep going in your practice. Keep experimenting in order to feel the connection in your own body. As you get stronger, it’s your job to make sure that you put more into your practice! Be sure to share your results with me at Fittbe Pilates. Your journey will inspire others! Who’s ready to hit the mat!?
-
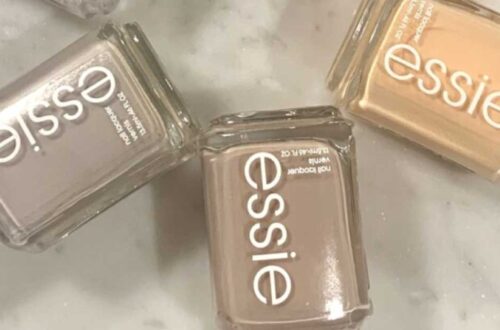
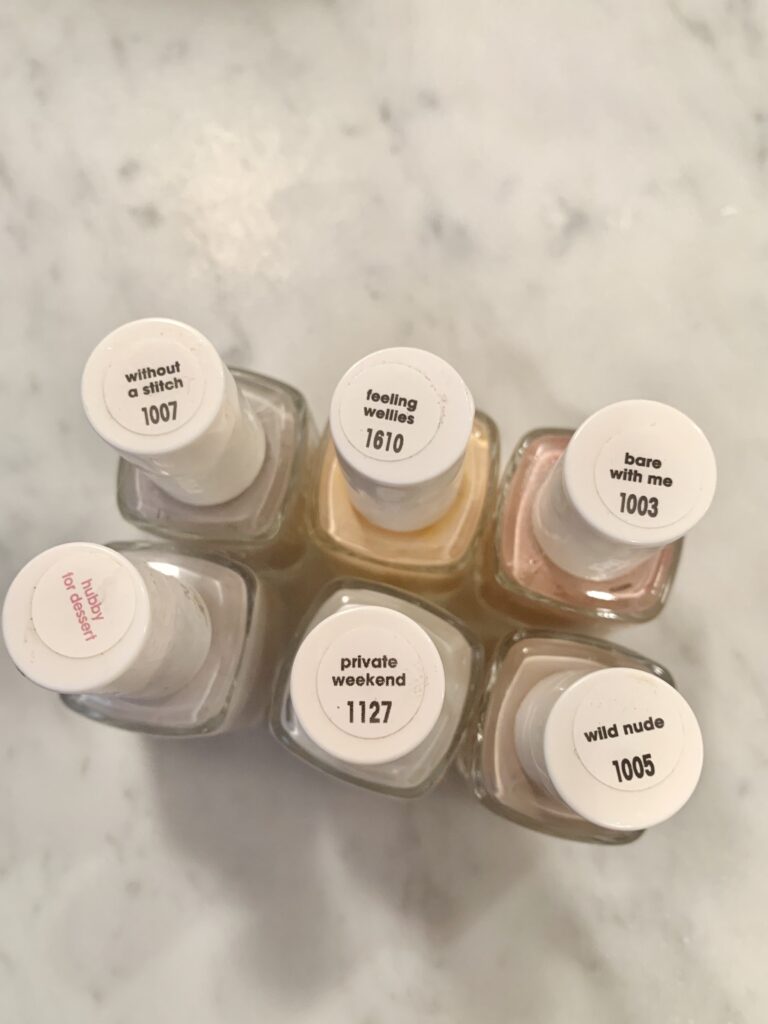
Tips to Keep your Manicure from Chipping!
Lately, I’ve been really into neutral nail colors, they’re versatile, classic, and don’t show chips as well (I’m a stickler for good-looking nails without chips). I’ve been painting my nail since I was about 12, and I’ve learned a thing or two to keep them from chipping!

Essie Colors listed in in photos:
Hubby For Dessert
Here is what I have learned:
- The shorter the better, I usually cut my nails just to the tips of my fingers, which leaves plenty of nail for color and less area for chipping!
- Use good quality polish, my personal favorites are Essie and OPI- they usually only require one coat but I typically do two since I’m a sucker for nice nails
- If you like, use a neutral color, that way if your nails do chip, it will be less noticeable! This is also a great choice for travel- since a nice manicure always goes great with a vacation (and all your Instagram worthy photos!)
- Top with a clear coat for extra protection and shine!
- Don’t rush and shake between coats for optimum coverage.
Best ‘at home’ manicure ever- #nailedit
xx,
T
-
“Healthy-ish” Peanut Butter Cups
These “healthy-ish” Peanut butter cups are really tasty, loaded with protein and refined sugar-free these peanut butter cups are sure to please. These are a great snack with a cup of tea or perfect for the kids lunches!
Makes 6-8 Peanut Butter Cups
Ingredients
Chocolate Layer
- 1/2 cup coconut oil, melted
- 1/4 cup cocoa powder
- 3 tablespoons maple syrup
- 1/2 teaspoon vanilla
In a mixing bowl, Mix together the coconut oil, cocoa powder, maple syrup and vanilla until combined. Layer into a square baking dish or muffin tin (since these are for valentines day you can use a heart shaped mold!). and place into the freezer for 15-20 minutes.
Peanut Butter Layer
- 1/2 cup coconut oil, melted
- 1/2 cup peanut butter (salted, chunky peanut butter)
- 1/4 cup maple syrup
- 1 1/2 teaspoons vanilla
- 2 tablespoons of chia seeds (optional)
- Powdered Sugar for garnish
Mix together Coconut oil, peanut butter, maple syrup and vanilla until combined. Pour on top of chocolate layer, Sprinkle with chia seeds. Freeze for 15-20 minutes.
At this point you can either slice with a warm knife or cookie cutter, or unmold!
Place on a plate and sprinkle with powdered sugar.
Enjoy!
xx,
T
-
Light, Sunday Morning Banana Muffins
Sunday Mornings call for tasty treats and these muffins are de-lish! They are a great use for those sad brown bananas and are pretty quick to prep. Bonus – you can use only 1 bowl (less dishes to wash…yes please!). Most importantly, they are scrumptious!
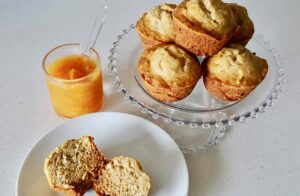
When you allow bananas to turn brown and almost mushy, they become extra sweet, which makes them the perfect ingredient to use when trying to bake using less sugar. These muffins use agave nectar as a sugar substitution which adds a slightly “nutty” flavor. Slivered almonds the perfect complement if you are a nut lover.
Take to bananas out of the freezer about 15 minutes before you cook start prepping!
Preheat oven to 325 degrees
2/3 cups coconut oil
1/2 cups agave nectar
2 eggs
1 1/2 cups mashed bananas
1 teaspoon baking soda
2 teaspoons vanilla extract
1 tablespoon chia seeds
1/2 teaspoon salt
1 1/2 cups flour
1/2 cups slivered almonds or walnuts
Prepare your muffin tin by greasing all 12 muffin cups.
Melt coconut oil in the microwave until it’s fully liquid. Add agave and whisk, once combined, add 2 eggs and combine thoroughly. Add in bananas, baking soda, vanilla, chia seeds, salt and flour. Mix to combine and until dry ingredients are fully incorporated. Fold in nuts.
Divide batter evenly between 12 muffin cups.
Bake for 30 minutes or until a toothpick inserted in the center comes out clean.
Let these babies cool and serve!
Enjoy the perfect little snack, quick breakfast or mid morning pick me up!
xx,
gracegrl
-
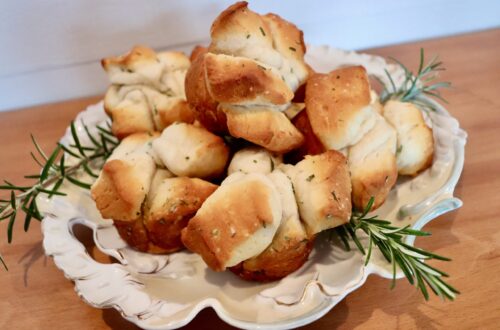
Truffled Rosemary Monkey Bread Muffins
Upgrade your biscuit game with these incredibly delicious, simple and fun to eat muffins! I like to serve these with soup and they would be great at your holiday table as well! The cool thing is that because they’re cut into smaller pieces and tossed in the coating all the pieces have flavor!

Makes 12 large muffins
- 2- 16 oz packages buttermilk biscuits (you can find these at the local supermarket or my favorite store, Trader Joes!)
- 1 Tablespoon fresh rosemary finely chopped
- 3 Tablespoons butter, melted
- 2 Tablespoons truffle oil
- 1/2 Teaspoon salt
- 2 Tablespoons parmesan cheese
Preheat oven to 350 degrees.
Spray a muffin tin with cooking spray, set aside. Open biscuit packages and cut each biscuit into 6 pieces.
In a large bowl mix rosemary, butter, truffle oil and salt. Whisk together until combined, add biscuit pieces and toss until completely coated.
Sprinkle parmesan in the bottom of each muffin tin and fill with coated biscuit pieces until all pieces are gone. Press each one down slightly so the pieces stick together.
Bake for 9 minutes until the tops start to brown, then turn down the oven to
325 d egrees, cover with foil and bake for another 9 minutes.Remove from oven, let cool for 5 minutes before removing from muffin tin.
Enjoy these taste morsels of goodness!